
Braze Red Baron Free Play and High Score Save Kit


Product information "Braze Red Baron Free Play and High Score Save Kit"
Braze Red Baron High Score Save Kit — Features & Install
Overview
A simple-to-install high score save kit for Red Baron that permanently remembers the top 7 scores and initials—no batteries required. It also functions as a ROM Saver, reducing issues from aging sockets. Premium gold-plated machined header pins provide a strong, reliable connection, and the daughter card snaps firmly into place. No special wiring or soldering is required.
Installation Summary
- Power down the cabinet and access the CPU board.
- Carefully remove the 6502 CPU from the Red Baron board.
- Insert the 6502 into the included daughter card.
- Plug the daughter card into the vacated 6502 CPU socket on the board.
- Power on and follow the install guide to verify operation.
To clear saved scores: enter Self Test, then press and hold Start + Fire until the screen displays “ERASED.”
Key Features
- Installs in minutes: no board modifications or special wiring; no soldering required.
- Top 7 High Score Save: scores and initials are retained permanently (no batteries).
- ROM Saver: reduces problems from aging or intermittent ROM sockets.
- Premium hardware: gold-plated machined header pins; daughter card locks firmly in place.
- Easy reset: clear the table via Self Test (Start + Fire) with on-screen “ERASED” confirmation.
FAQ
Where can I download the install guide?
Do I need to solder anything?
No. Installation requires no soldering or special wiring.
How do I clear the high scores?
Enter Self Test, then press and hold Start + Fire until “ERASED” appears on screen.
Which CPU does this kit use?
The kit interfaces with the 6502 CPU—remove the existing 6502, place it in the daughter card, then plug the card into the 6502 socket.
What ensures a reliable connection?
Gold-plated machined header pins provide a secure, long-lasting connection to the Red Baron CPU socket.
Login
1 review
September 23, 2025 12:45 AM
I love seeing my scores!
Not only was this easy to install but it's nice that it saves the top seven scores. It was great for a party as well we were all trying to get the high score and it's nice because I've had some people come back later after I turn the machine off and show them that their scores from the party are still there and the game gets play every time people come over. Plus HSS only sales the highest quality items
Accessories

6502 8-Bit Microprocessor (40-Pin CPU) The 6502 is a classic 8-bit microprocessor widely used in early arcade hardware and computer systems. This 40-pin DIP CPU served as the primary processor for many classic arcade PCBs and is responsible for executing the game program, processing player inputs, and controlling overall system timing. Many Atari arcade boards rely on the 6502 processor to manage gameplay logic and communicate with other hardware components such as ROM chips, RAM, and video circuitry. A working CPU is essential for proper board operation, making the 6502 a common replacement component during arcade PCB repair and restoration. Key Features 6502 8-bit microprocessor Standard 40-pin DIP (Dual In-line Package) Commonly used in classic arcade PCBs Handles game logic, timing, and hardware control Ideal for arcade board troubleshooting and repair Used In Arcade Games Such As Asteroids Battlezone Centipede Tempest Warlords Missile Command Gravitar Red Baron Because the 6502 processor was widely adopted by Atari and other arcade manufacturers, it appears on many classic arcade boards from the late 1970s and early 1980s. Installation Notes Installs in a standard 40-pin DIP socket Carefully align the notch orientation when installing Recommended for technicians performing arcade PCB repair or restoration *Manufacturer brands may vary.

Any Coin Mech for Home Arcades The Any Coin Mech is designed as a direct drop-in replacement for many popular arcade coin mechanisms, including models from Happ, Coinco, Imonex, and other manufacturers. It provides a simple and reliable solution for restoring or upgrading the coin acceptance system in arcade machines. This versatile coin mechanism is ideal for home arcade cabinets and personal arcade setups where flexibility and reliability are important. The design accepts multiple coin types without requiring adjustments, making it easy to install and use. Key Features Direct drop-in replacement for many existing arcade coin mechanisms Accepts quarters, 0.984″ tokens, and dimes with no adjustment required Engineered to reduce coin jams and improve long-term reliability Includes four durable plastic mounting pegs that will not rust Proudly made in the USA Ideal for home arcade cabinets and custom arcade builds Compatibility This coin mechanism has been tested with a wide range of arcade hardware and is compatible with machines manufactured by: Atari Bally Midway Gottlieb Stern Taito Williams Sega and many other arcade manufacturers The Any Coin Mech is a convenient solution for arcade restorations and modern home arcade builds that require a dependable coin acceptor capable of handling multiple coin types.

Arcade PCB Mounting Feet Kit This PCB mounting feet kit provides a simple and reliable way to secure arcade circuit boards inside a cabinet. These plastic stand-offs elevate the PCB slightly above the mounting surface, helping protect the board from shorts, vibration, and damage caused by direct contact with the cabinet or mounting panel. Properly mounting a PCB is important for long-term reliability. Using mounting feet keeps the board stable while also allowing airflow beneath the PCB, which can help reduce heat buildup during operation. Kit Includes 4 white PCB mounting feet 4 mounting screws Installation Notes Designed to raise the PCB off the mounting surface for protection Helps prevent shorts and accidental contact with cabinet hardware Recommended for arcade PCB installations, repairs, and restorations We recommend using these mounting feet whenever installing or replacing an arcade PCB to ensure the board is properly supported and secured inside the cabinet.

Easy CoinUp (E.C.U.) — Quarter-Style Coin-Up Switch It Just Makes Sense! We’ve all seen it: a loose switch dangling from the coin door, or a hole drilled in the cabinet just to add credits. Many games offer a Free Play mode, but some disable attract sounds or visuals—so passers-by never see or hear the game in action. Easy CoinUp fixes that. It’s a pushbutton that looks like a quarter, so everyone knows exactly what it does: add a credit. Installation is simple and causes no permanent damage beyond applying adhesive to the metal coin door. Installation Instructions (Quick & Easy) Peel the backing liner and apply the E.C.U. where you want it mounted. Wrap the “tail” around the coin door, pressing firmly so the adhesive bonds (industrial 3M 300LSE—once it sticks, it sticks). Peel the second liner and apply the “Quarter” overlay to the front of the switch. Solder two wires from the tail’s solder pads to the machine’s coin switch. The E.C.U. is a membrane SPST switch; your machine must expect a single circuit closure (typical for most arcade and pinball machines). Insulate the E.C.U. pins with electrical tape after soldering so they can’t touch grounded metal or other circuits. Note: Installation requires basic soldering. Tips & Tricks Thoroughly clean the mounting area; finish with rubbing alcohol and let it evaporate. Mount near the “Insert Coin” slots so players find it quickly. Avoid high-friction spots on the coin door; look for rubbed paint or scratches and choose a smoother area. If the conductive circuit in the tail is worn through, the switch will stop working—route and secure it thoughtfully. Keep out of reach of children—they may peel or try to swallow the parts.

DK / DK Jr. Pin-Harness to Card-Edge Adapter This adapter converts the original pin-style cabinet wiring harness found in classic Donkey Kong and Donkey Kong Jr. cabinets to the newer card-edge connector used on later Nintendo board sets—making swaps and upgrades fast and reversible. Key Features Direct, plug-in conversion from pin-header harness to card-edge connector. No cutting or permanent changes to the original cabinet wiring. Clean signal routing for power, video, audio, and controls. Keyed/marked orientation to help prevent mis-connection. Compatibility Cabinets: Nintendo DK and DK Jr. with pin-style harness. Boards: Later Nintendo board sets using a card-edge connector (verify your specific PCB before installation). Installation Notes Power off the cabinet before connecting or removing the adapter. Match orientation/keys and seat connectors fully; avoid forcing the edge. No soldering required for standard harnesses. Tip: Check your cabinet’s wiring diagram and the target PCB pinout to confirm signal order before first power-on.

ARpiCADE 6-Pin Arcade Button Harness This arcade button harness connects additional control-panel buttons to compatible ARpiCADE hardware and other arcade control interfaces using the same 6-pin header configuration. It provides a clean wiring solution for extra inputs such as Player 1 or Player 2 buttons 4, 5 and 6. The harness is approximately 4 feet long, allowing flexible routing through most arcade cabinets. Each button wire terminates in a .187-inch female quick-disconnect connector for compatible arcade pushbutton microswitches. Key Features Compatible with supported ARpiCADE extended-button inputs Approximately 4 feet long for flexible cabinet installation .187-inch female quick-disconnect terminals 6-pin header connector for compatible control-interface headers Supports additional action buttons such as buttons 4, 5 and 6 Helps maintain clean and organized cabinet wiring Typical Uses Connecting extra action buttons to an arcade control panel ARpiCADE Player 1 or Player 2 extended-button inputs Six-button fighting-game control layouts Custom arcade cabinet builds and control-panel upgrades Compatible arcade hardware requiring a 6-pin button harness Compatibility Notice Confirm the header pinout, connector orientation and control-interface compatibility before installation. A matching 6-pin connector does not necessarily mean that every arcade PCB or control interface uses the same wiring arrangement. This listing includes the button harness only. Pushbuttons, microswitches, control panels, ARpiCADE hardware and other arcade components are not included.

Konami 4-Player Kick Harness – JAMMA+ Auxiliary Harness The Konami 4-Player Kick Harness allows you to connect the Player 3 or Player 4 joystick and buttons for Konami four-player arcade games. This harness connects directly to the PCB using a 15-pin header and provides properly numbered wiring to simplify installation in your arcade cabinet. Key Features Compatible with Konami 4-player arcade games Allows connection of Player 3 or Player 4 joystick and buttons Approximately 3 feet long for flexible cabinet installation .187 female quick disconnects for secure microswitch connections Includes enough ground connectors for arcade control wiring 15-pin header connects directly to your PCB Header is numbered to match wiring locations on your control panel Wire colors may vary, but pin numbers remain consistent Pinout Reference Download the full Konami 4-player kick harness pinout reference: Konami Kick Harness Pinout PDF Please Note: You will need two harnesses if you want to connect both Player 3 and Player 4 controls to your control panel.

6809E 8-Bit Microprocessor (40-Pin CPU) The 6809E is a powerful 8-bit microprocessor commonly used in classic arcade PCBs during the early and mid-1980s. This processor served as the main CPU for many arcade boards, executing game code, handling player inputs, and coordinating communication between memory, sound hardware, and video circuitry. Known for its advanced architecture compared to earlier processors, the 6809E provided improved instruction sets and efficient memory addressing, making it a popular choice for more complex arcade games. A properly functioning CPU is essential for reliable board operation, making the 6809E a common replacement component during arcade PCB repair and restoration. Key Features Motorola 6809E 8-bit microprocessor Standard 40-pin DIP (Dual In-line Package) Used as the main CPU in many classic arcade boards Handles game logic, timing, and hardware communication Ideal for arcade PCB repair and restoration work Used In Arcade Games Such As Circus Charlie Juno First Track & Field Hyper Sports Star Wars Qix …and many other classic arcade titles Some arcade boards use the 6809E processor in conjunction with other supporting chips or adapters. In certain Konami systems, the 6809E can be used with a 42-pin Konami-1 adapter, which is included with some HighScoreSaves kits. Installation Notes Installs into a standard 40-pin DIP socket on compatible arcade PCBs Ensure proper notch orientation when installing the CPU Recommended for technicians performing arcade board troubleshooting or restoration *Can be used with a 42-pin Konami-1 adapter (included with some HighScoreSaves kits). *Manufacturer brands may vary.
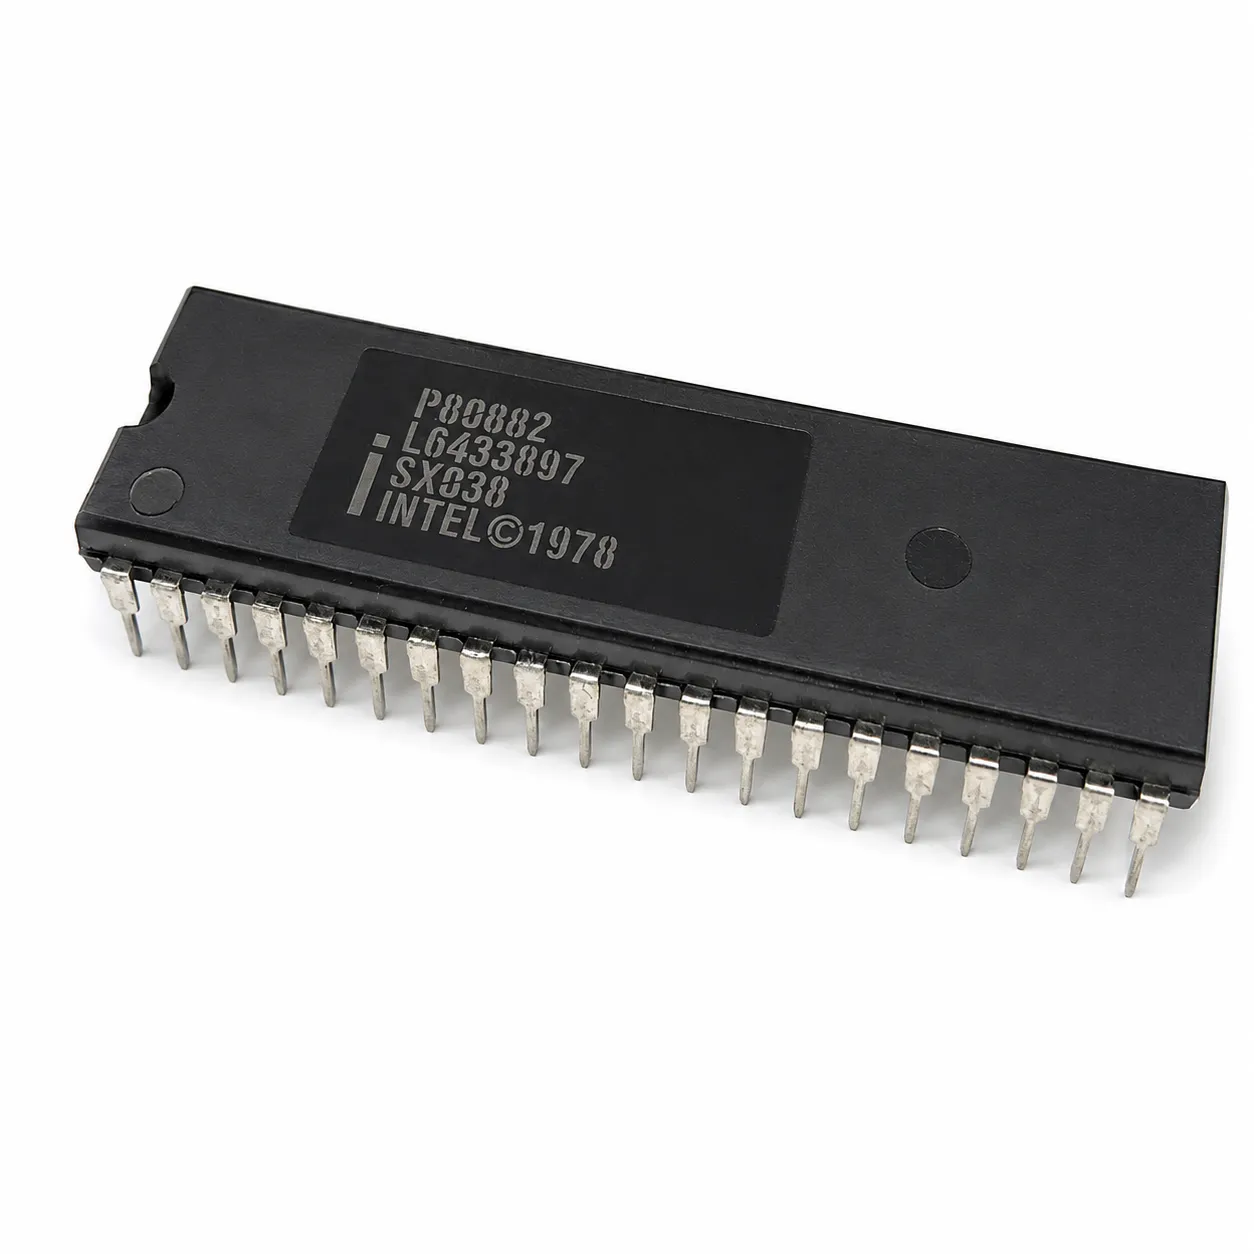
8080 8-Bit Microprocessor (40-Pin CPU) The Intel 8080 is a classic 8-bit microprocessor that powered many early arcade machines. Introduced in the mid-1970s, the 8080 became one of the foundational CPUs used in the first generation of dedicated arcade hardware. On arcade PCBs, the 8080 serves as the main processor responsible for executing the game program, handling player inputs, controlling game timing, and coordinating communication with video and sound hardware. Because it manages core gameplay functions, a properly functioning CPU is essential for reliable arcade board operation. The processor uses a standard 40-pin DIP (Dual In-line Package) and installs into a compatible socket on the arcade PCB. During arcade board troubleshooting or restoration, the 8080 is sometimes replaced to resolve boot failures, game resets, or non-functioning boards. Key Features Intel 8080 8-bit microprocessor Standard 40-pin DIP package Main CPU used in early arcade hardware Handles game logic, timing, and system control Suitable for arcade PCB repair and restoration Used In Arcade Games Such As Space Invaders Space Invaders Deluxe …and other early arcade titles using 8080-based hardware Installation Notes Installs into a standard 40-pin DIP socket on compatible arcade PCBs Ensure correct notch orientation when installing Recommended for technicians performing arcade PCB troubleshooting or restoration *Manufacturer brands or markings may vary.

Raspberry Pi - Model 3B Overview The Raspberry Pi - Model 3B is a compact single board computer commonly used for embedded projects and arcade builds. It is often paired with an ArPiCade Raspberry JAMMA Adapters to power a JAMMA cabinet setup. You'll Need (Not Included) Micro SD card with an ArPiCade image installed One of the following ArPiCade Raspberry JAMMA units: ArPiCade Mini Raspberry Pi JAMMA Adapter ArPiCade Raspberry Pi JAMMA Adapter ArPiCade Raspberry Pi JAMMA Adapter – 4 Player Keyboard and mouse (for menu customization) Specifications Raspberry Pi 3 Model B is the earliest model of the third-generation Raspberry Pi. Quad Core 1.2GHz Broadcom BCM2837 64bit CPU 1GB RAM BCM43438 wireless LAN and Bluetooth Low Energy (BLE) on board 100 Base Ethernet 40-pin extended GPIO 4 USB 2 ports 4 Pole stereo output and composite video port Full size HDMI® CSI camera port for connecting a Raspberry Pi camera DSI display port for connecting a Raspberry Pi touchscreen display Micro SD port for loading your operating system and storing data Upgraded switched Micro USB power source up to 2.5A

40-Pin Socket Specifications This 40-pin DIP socket is designed for reliable installation of integrated circuits and arcade daughter boards that use a standard 40-pin layout. Using a socket allows the chip or module to be easily removed or replaced without soldering directly to the PCB, helping protect the board during upgrades, repairs, or troubleshooting. Pin Pitch: 2.54 mm (0.100″) standard DIP spacing Total Pins: 40 pins arranged in two rows (2×20) Mounting Type: Through-hole (THT) for secure soldered installation Compatibility: Designed for standard 40-pin DIP integrated circuits and modules Installation Benefit: Allows ICs to be inserted or removed without repeated soldering Use Case: Ideal for arcade PCB upgrades, ROM installations, and repair work The standard 2.54 mm (0.100″) pin spacing matches the layout used on most classic arcade PCBs and DIP integrated circuits. Once soldered to the board, the socket provides a stable connection while allowing the chip to be safely inserted and removed when needed.
You may also like -

Darksoft Namco System 2 Multigame Kit Overview The Darksoft Namco System 2 Multigame Kit allows supported games to run on compatible original Namco System 2 arcade hardware from one multigame setup. The kit uses separate multigame PCBs for the original main PCB and Video PCB, along with ten programmable memory modules and a rotary game selector. This is an advanced board-level installation. Before ordering, confirm that you have a working Namco System 2 motherboard and the compatible Video PCB revision shown in the installation guide. Not every Namco System 2 board stack is compatible. View/Download Namco System 2 Install Guide (PDF) Flat Rate U.S. Shipping: $35.99. Insurance included. Ships with Signature Required. Ship two Darksoft Multigame Kits for the same shipping price. What Is Included One larger multigame PCB for the original Namco System 2 main PCB One smaller multigame PCB for the compatible System 2 Video PCB Seven removable memory modules for the main-board multigame PCB Three removable memory modules for the Video PCB multigame board One adapter for programming the removable memory modules One cable connecting the main-board and Video PCB multigame boards One rotary game-selector assembly and connecting cable Required Hardware and Compatibility A working original Namco System 2 main PCB The compatible Namco System 2 Video PCB revision shown in the installation guide A working arcade cabinet or compatible supergun setup A valid KEYCUS protection device on the Video PCB, or the diode replacement described in the installation guide A ProMan, also known as a TL86_Plus, programmer when programming the ten memory modules yourself Compatible files for each removable memory module The memory-module programming adapter is included. The ProMan/TL86_Plus programmer is not included. Donor-Board Preparation Main PCB Preparation The Mask ROMs and EPROMs identified in the guide must be removed from the MAINCPU, SLAVE CPU, AUDIOCPU, C140 voices, C123 tilemap, and DATAROM sections. Do not remove chips identified as SRAM or MCU. Video PCB Preparation Remove only the chips identified in the S2ROZ and SPRITES sections of the compatible Video PCB. Do not remove the KEYCUS protection device, SRAM, or USER2 chips. Jumper and DIP-Switch Settings The jumpers on both donor boards must be configured exactly as shown in the installation guide. Set all main-board DIP switches to OFF before the initial startup. Individual settings may be adjusted later for supported games. Ground-Plate Clearance Inspect the original main PCB for vertically mounted metal ground plates. Any plate that could contact the underside of the multigame PCB must be carefully removed or repositioned before installation. Contact between a ground plate and the multigame PCB can damage the kit. Multigame Board Installation Separate the original main PCB and Video PCB before installing the two multigame boards. Remove each multigame PCB vertically from its protective antistatic foam to avoid bending the underside pins. Carefully align every multigame-board pin with the corresponding donor PCB socket before applying pressure. Install the larger multigame PCB on the original main PCB. Install the smaller multigame PCB on the compatible Video PCB. Reassemble the System 2 board stack after both multigame PCBs are securely installed. Connect the linking cable between the two multigame PCBs. Connect the rotary-selector cable to the larger multigame PCB. Programming the Memory Modules The kit uses ten removable memory modules: seven on the main-board multigame PCB and three on the Video PCB multigame board. Each module must be programmed individually with the included adapter and a ProMan/TL86_Plus programmer. The modules use 128-Mbit, 256-Mbit, and 512-Mbit capacities. Follow the installation guide when selecting the device size in the programmer software. Some module sizes require manual configuration. Return every programmed module to its designated position and align the white orientation triangle on the module with the matching triangle on the multigame PCB. Do not interchange module positions. Selecting a Game After the donor boards, multigame PCBs, cables, and programmed memory modules are correctly installed, choose the desired configuration with the rotary selector and power on the Namco System 2 hardware. Change the rotary-selector position only while the system is powered off. Important Before Ordering Not every Namco System 2 main PCB and Video PCB combination is compatible. Compare your Video PCB with the board pictured in the installation guide. This installation requires board-stack disassembly, ROM removal, jumper configuration, memory programming, and careful multigame-board alignment. Use an experienced arcade technician when you are not comfortable performing board-level installation work. Disconnect power and discharge static before handling the original boards, multigame PCBs, or memory modules. Only use game data that you are legally entitled to possess and operate. Shipping Information Please note: This product ships with insurance and signature confirmation. Orders normally ship within 1–3 business days. United States Flat-rate shipping is $35.99 through USPS or UPS based on package size, weight, and destination. Two Darksoft Multigame Kits can ship together for the same flat-rate shipping price. International Orders containing Darksoft products ship by expedited UPS international service. Customs duties, taxes, brokerage charges, and import fees are the customer’s responsibility. A telephone number is required for international shipments. HighScoreSaves cannot under-declare shipment values. Suggested tariff code: 95049080. Darksoft Namco System 2 Technical Support Technical information and community support are available through the Arcade Projects Namco Hardware Support forum. ArcadeProjects.com — Namco Hardware Support Review the installation guide and contact HighScoreSaves or the support community before concluding that a kit or component is defective. Frequently Asked Questions What original hardware is required? You need a working original Namco System 2 main PCB, the compatible Video PCB revision, and a working arcade cabinet or compatible supergun setup. Do all Namco System 2 board revisions work? No. Only System 2 board stacks using the compatible Video PCB shown in the installation guide are supported. How many memory modules must be programmed? Ten modules must be programmed individually: seven for the main-board multigame PCB and three for the Video PCB multigame board. Is a programmer included? No. The memory-module adapter is included, but a ProMan/TL86_Plus programmer is required when programming the modules yourself. Does this kit use a microSD card? No. The game data is programmed directly onto the ten removable memory modules. How are games selected? Select the desired programmed configuration with the included rotary selector while the system is powered off, then power on the hardware. Where can I get technical support? Review the installation guide and visit the Arcade Projects Namco Hardware Support forum . Where can I review Namco System 2 compatibility information? Visit the Darksoft Namco System 2 Multigame Kits category for compatibility and installation information.

Darksoft Neo Geo MVS Multigame Kit Overview The Darksoft Neo Geo MVS Multigame Kit is designed for compatible original SNK Neo Geo MVS arcade hardware. The cartridge combines flash memory and DDR memory to hold up to three games at the same time, effectively giving a single-slot MVS motherboard three virtual game slots. Games are stored on a compatible microSD card and managed through the cartridge’s on-screen menu. The cartridge remembers the games assigned to Slots 1, 2, and 3 after power is removed, so your selected titles remain available the next time the MVS system starts. View/Download Neo Geo MVS Install Guide (PDF) Flat Rate U.S. Shipping: $35.99. Insurance included. Ships with Signature Required. Ship two Darksoft Multigame Kits for the same shipping price. Compatibility and Requirements Designed for compatible original SNK Neo Geo MVS arcade motherboards. Supports single-slot and multi-slot MVS configurations. This product is not the Neo Geo AES console version. Confirm that the MVS motherboard operates correctly with a standard cartridge before installing the multigame cartridge. Inspect and clean the MVS cartridge-slot contacts when necessary. Check the motherboard backup battery if game settings and high-score information are not being retained correctly. A compatible microSD card is required and is not included. Key Features Three Simultaneous Game Slots Load up to three games into Slots 1, 2, and 3. A single-slot MVS motherboard can operate with three virtual game slots through one Darksoft cartridge. Persistent Game Assignments The cartridge records which games are assigned to each slot. Those assignments remain after the system is powered off and are restored during the next startup. Original Neo Geo Game Support The cartridge supports original Neo Geo game data without requiring modifications. Some protected bootleg or modified versions may require patches or may not be supported. Game List and Thumbnail Menus Browse available titles as a text list or with thumbnail images. Games can be added to or removed from any of the three virtual slots through the on-screen menu. QuickLaunch Highlight a game and use QuickLaunch to load it into Slot 1 and start it directly. Games already assigned to Slots 2 and 3 remain unchanged. Firmware and Menu Updates Firmware and menu updates can be installed from the microSD card using the update-folder structure described in the manual. Cartridge and microSD Installation Power off the MVS motherboard before inserting or removing the cartridge. Discharge static by touching a grounded surface before handling the cartridge. Install the cartridge in the same orientation as a standard MVS cartridge, following the white orientation triangle. Prepare the microSD card with a folder named games. Place only compatible game, homebrew, or personally developed files that you are legally entitled to use inside the games folder. Insert the microSD card before powering on the system. Power off the system before inserting or removing the microSD card. Do not open or tamper with the cartridge enclosure or internal PCB. Menu and Game Selection Starting the Menu or a Loaded Game During the startup countdown, use Player 1 Start to open the menu or use the appropriate action button to start the game assigned to Slot 1, Slot 2, or Slot 3. Applying Slot Changes Adding or removing games does not update the cartridge immediately. Use the menu’s exit-and-program function to save the slot changes and write any newly selected game data. In-Game Hotkeys Hold Player 1 Start and Up for approximately three seconds to return to the cartridge menu. Hold Player 1 Start and Left or Right for approximately three seconds to move to the previous or next loaded game slot. Hotkeys can be disabled through the menu configuration when player access should be restricted. MVS Settings and High-Score Storage Game SoftDIP Settings On MVS hardware, the cartridge menu can display and adjust supported original game settings such as difficulty, number of players, demo sounds, and language after the game has been run at least once. Region and Operating Mode The system-configuration menu can select USA, Europe, or Japan region operation and can run supported titles in MVS or AES software mode. This does not convert the physical MVS cartridge into an AES-console cartridge. Backup-RAM Management Neo Geo MVS backup RAM stores settings, high scores, and related data for a limited number of games. The cartridge can back up displaced game data to the microSD card and restore it later through the menu. Cartridge Diagnostics The menu includes cartridge diagnostics and an information screen for checking the installed firmware version and the number of available games detected on the microSD card. Important Before Use Power off the MVS hardware before inserting or removing either the cartridge or the microSD card. Do not manually edit the SLOT1, SLOT2, or SLOT3 files created on the microSD card. Complete all game changes through the cartridge menu and its exit-and-program option. Use only compatible files that you are legally entitled to possess and operate. Review the complete manual before performing firmware updates or changing the microSD folder structure. Shipping Information Please note: This product ships with insurance and signature confirmation. Orders normally ship within 1–3 business days. United States Flat-rate shipping is $35.99 through USPS or UPS based on package size, weight, and destination. Two Darksoft Multigame Kits can ship together for the same flat-rate shipping price. International Orders containing Darksoft products ship by expedited UPS international service. Customs duties, taxes, brokerage charges, and import fees are the customer’s responsibility. A telephone number is required for international shipments. HighScoreSaves cannot under-declare shipment values. Suggested tariff code: 95049080. Darksoft Neo Geo MVS Technical Support Technical information and community assistance are available through the Arcade Projects Neo Geo MVS and AES forum. ArcadeProjects.com — Neo Geo MVS Information Review the installation guide and contact HighScoreSaves or the support community before concluding that the cartridge is defective. Frequently Asked Questions Is this cartridge compatible with Neo Geo AES consoles? No. This listing is for the cartridge intended for compatible original Neo Geo MVS arcade hardware. How many games can be loaded at once? The cartridge can hold up to three games simultaneously in its three virtual slots. Do the selected games remain after power is removed? Yes. The cartridge remembers which games are assigned to Slots 1, 2, and 3 and restores those assignments during the next startup. Can I remove the microSD card while the system is powered? No. Power off the MVS hardware before inserting or removing the microSD card or cartridge. Is a microSD card included? No. A compatible microSD card must be supplied separately and prepared with the required games folder. How are game settings and high scores retained? Original MVS backup RAM stores game settings and high-score data. The cartridge menu can back up displaced game information to the microSD card and restore it later. How do I return to the cartridge menu? Hold Player 1 Start and Up for approximately three seconds during gameplay. Where can I get technical support? Review the installation guide and visit the Arcade Projects Neo Geo MVS and AES forum . Where can I review MVS compatibility and setup information? Visit the Darksoft Neo Geo MVS Multigame Kits category for compatibility and setup information.

``` 1942 Free Play and High Score Save Kit for Capcom Arcade PCB Upgrade your original Capcom 1942 arcade PCB with Free Play, permanent high score saving, additional game settings, and optional Wi-Fi leaderboard support while preserving the original gameplay, timing, controls, and sound. This plug-and-play arcade PCB upgrade uses the original Z80 processor and authentic Capcom hardware. Installation requires a socketed Z80 CPU. No soldering is required when the original processor is already installed in a socket. Original Arcade Hardware • No Emulation • No Gameplay Changes • Battery-Free Score Storage View 1942 Install Guide Free Play Start games without coins while retaining normal coin operation when desired. High Score Saving Battery-free EEPROM storage retains scores and settings after power is turned off. Optional Wi-Fi Submit qualifying scores to the HighScoreSaves online leaderboard. Original Hardware Designed specifically for an original Capcom 1942 arcade PCB. Add Permanent Score Saving to Your Original 1942 Arcade PCB Original 1942 arcade hardware does not retain high scores after the machine is powered off. This kit adds battery-free score storage while continuing to use the original Capcom PCB, Z80 processor, controls, sound hardware, and game program. The kit displays the five highest scores during normal gameplay and stores up to 25 scores. It also adds Free Play, adjustable settings, multiple score tables, attract-mode options, backup and restore functions, and a practice-oriented God Mode. This is not an emulator, replacement game board, or multigame system. The original 1942 gameplay remains unchanged. Included Features Free Play Mode: Play without coins while retaining optional coin operation. Permanent High Score Saving: Battery-free EEPROM storage retains scores after power is turned off. Top Score Tracking: Displays the Top 5 scores and stores up to 25 scores. On-Screen Settings Menu: Adjust supported game options from the control panel after installation. Attract-Mode Options: Additional settings help reduce prolonged static-image display time. Score Backup and Restore: Back up stored score data and restore it when needed. Multiple Score Tables: Maintains separate score tables for supported lives settings. God Mode: Practice with unlimited lives. Scores earned in God Mode are not saved. ROM Saver: Supports removal of designated original program ROMs as explained in the installation guide. Cabinet Compatibility: Supports upright and cocktail 1942 arcade cabinets using compatible original Capcom hardware. Installation Requirements Compatible Hardware: Original Capcom 1942 arcade PCB Installation Difficulty: Easy when the original Z80 CPU is already socketed Typical Installation Time: Approximately 10–20 minutes Soldering Required: No, when the Z80 CPU is already socketed CPU Socket Requirement: The original Z80 processor must be installed in a 40-pin socket If the Z80 Is Soldered: A qualified arcade technician must remove the processor and install a 40-pin socket before the kit can be used Cabinet Access: Access to the arcade PCB is required during installation Cabinet Compatibility: Upright and cocktail cabinets using compatible original hardware Installation Guide: Download the 1942 Installation Guide PDF Standard and Optional Wi-Fi Kits Compare Standard and Wi-Fi Enabled Kits The Standard Kit permanently saves scores and settings locally on the installed arcade PCB. It does not require an internet connection. The optional Wi-Fi Enabled Kit includes the same local score-saving features and can also submit qualifying scores to the HighScoreSaves online leaderboard after a player enters their initials. Wi-Fi-enabled kits connect to compatible 2.4 GHz Wi-Fi networks. Wi-Fi can be disabled without affecting local score saving or normal gameplay. View Global Arcade High Scores 1942 Free Play and High Score Save Kit FAQ Is the 1942 Free Play and High Score Save Kit plug and play? Yes, when the original Z80 CPU is already installed in a socket. The original processor is removed from the PCB, installed on the kit, and the assembled kit is placed into the original CPU socket. Does installation require soldering? No soldering is required when the original Z80 CPU is already socketed. If the processor is soldered directly to the PCB, a qualified technician must install a 40-pin socket first. How many high scores does the 1942 kit save? The kit displays the Top 5 scores and permanently stores up to 25 scores. Does the kit change the original 1942 gameplay? No. The kit continues to use the original Capcom arcade PCB, processor, controls, sound hardware, and game program. It does not emulate or replace the original gameplay. What is the difference between Standard and Wi-Fi kits? Both versions save scores locally. The Wi-Fi version can also submit qualifying scores to the HighScoreSaves online leaderboard through a compatible 2.4 GHz Wi-Fi connection. What is God Mode? God Mode is a practice setting that provides unlimited lives. Scores earned while God Mode is active are not saved. Where can I download the installation guide? Download the 1942 Installation Guide PDF Designed, tested, and supported by HighScoreSaves for arcade collectors, operators, restorers, and original-hardware enthusiasts. 1942 Kit Resources 1. 1942 Installation Guide PDF 2. HighScoreSaves Setup Tips and Menu Guide 3. Standard and Wi-Fi Kit Comparison 4. Global Arcade High Score Leaderboards 5. HighScoreSaves YouTube Channel

1943 Free Play and High Score Save Kit for Capcom Arcade PCB Upgrade your original Capcom 1943 arcade PCB with Free Play, permanent high score saving, additional game settings, and optional Wi-Fi leaderboard support while preserving the original gameplay, timing, controls, and sound. This plug-and-play arcade PCB upgrade uses the original Z80 processor and authentic Capcom hardware. Installation requires a socketed Z80 CPU. No soldering is required when the original processor is already installed in a socket. Original Arcade Hardware • No Emulation • No Gameplay Changes • Battery-Free Score Storage View 1943 Install Guide Free Play Start games without coins while retaining normal coin operation when desired. High Score Saving Battery-free EEPROM storage retains scores and settings after power is turned off. Optional Wi-Fi Submit qualifying scores to the HighScoreSaves online leaderboard. Original Hardware Designed specifically for an original Capcom 1943 arcade PCB. Add Permanent Score Saving to Your Original 1943 Arcade PCB Original 1943 arcade hardware does not retain high scores after the machine is powered off. This kit adds battery-free score storage while continuing to use the original Capcom PCB, Z80 processor, controls, sound hardware, and game program. The kit displays the five highest scores during normal gameplay and stores up to 25 scores. It also adds Free Play, adjustable game settings, separate score tables based on difficulty, attract-mode options, backup and restore functions, and a practice-oriented God Mode. This is not an emulator, replacement game board, or multigame system. The original 1943 gameplay remains unchanged. Included Features Free Play Mode: Play without coins while retaining optional coin operation. Permanent High Score Saving: Battery-free EEPROM storage retains scores after power is turned off. Top Score Tracking: Displays the Top 5 scores and permanently stores up to 25 scores. On-Screen Settings Menu: Adjust supported game options through the arcade controls after installation. Attract-Mode Options: Additional settings help reduce prolonged static-image display time. Score Backup and Restore: Back up stored score data and restore it when needed. Difficulty-Based Score Tables: Maintains separate high score tables for supported difficulty settings. God Mode: Practice with unlimited lives. Scores earned in God Mode are not saved. ROM Saver: Supports removal of designated original program ROMs as explained in the installation guide. Cabinet Compatibility: Supports upright and cocktail 1943 arcade cabinets using compatible original Capcom hardware. Installation Requirements Compatible Hardware: Original Capcom 1943 arcade PCB Installation Difficulty: Easy when the original Z80 CPU is already socketed Soldering Required: No, when the Z80 CPU is already socketed CPU Socket Requirement: The original Z80 processor must be installed in a 40-pin socket If the Z80 Is Soldered: A qualified arcade technician must remove the processor and install a 40-pin socket before the kit can be used Cabinet Access: Access to the arcade PCB is required during installation Cabinet Compatibility: Upright and cocktail cabinets using compatible original hardware Installation Guide: Download the 1943 Installation Guide PDF Standard and Optional Wi-Fi Kits Compare Standard and Wi-Fi Enabled Kits The Standard Kit permanently saves scores and settings locally on the installed arcade PCB. It does not require an internet connection. The optional Wi-Fi Enabled Kit includes the same local score-saving features and can also submit qualifying scores to the HighScoreSaves online leaderboard after a player enters their initials. Wi-Fi-enabled kits connect to compatible 2.4 GHz Wi-Fi networks. Wi-Fi can be disabled without affecting local score saving or normal gameplay. View Global Arcade High Scores 1943 Free Play and High Score Save Kit FAQ Is the 1943 Free Play and High Score Save Kit plug and play? Yes, when the original Z80 CPU is already installed in a socket. The original processor is removed from the PCB, installed on the kit, and the assembled kit is placed into the original CPU socket. Does installation require soldering? No soldering is required when the original Z80 CPU is already socketed. If the processor is soldered directly to the PCB, a qualified technician must install a 40-pin socket first. How many high scores does the 1943 kit save? The kit displays the Top 5 scores and permanently stores up to 25 scores. Does the kit change the original 1943 gameplay? No. The kit continues to use the original Capcom arcade PCB, processor, controls, sound hardware, and game program. It does not emulate or replace the original gameplay. What is the difference between Standard and Wi-Fi kits? Both versions save scores locally. The Wi-Fi version can also submit qualifying scores to the HighScoreSaves online leaderboard through a compatible 2.4 GHz Wi-Fi connection. What is God Mode? God Mode is a practice setting that provides unlimited lives. Scores earned while God Mode is active are not saved. Where can I download the installation guide? Download the 1943 Installation Guide PDF Designed, tested, and supported by HighScoreSaves for arcade collectors, operators, restorers, and original-hardware enthusiasts. 1943 Kit Resources 1. 1943 Installation Guide PDF 2. HighScoreSaves Setup Tips and Menu Guide 3. Standard and Wi-Fi Kit Comparison 4. Global Arcade High Score Leaderboards 5. HighScoreSaves YouTube Channel

The Three Stooges Arcade Reproduction Control Panel Direct replacement control panel for The Three Stooges arcade cabinet. Restore your The Three Stooges arcade cabinet with this high-quality reproduction control panel. This metal control panel is designed as a direct replacement for the original panel used in dedicated The Three Stooges upright arcade machines. It closely replicates the original size, shape, and mounting layout so it fits properly in the cabinet while maintaining the authentic appearance of the control panel area. Original control panels often suffer from rust, corrosion, bent metal, or heavy wear after decades of gameplay. This reproduction panel provides a clean foundation for arcade restoration projects, allowing collectors and technicians to rebuild the control panel while preserving the correct look and feel of the original arcade hardware. Important Information This listing includes the metal control panel only. No buttons, joysticks, wiring, harnesses, or wood components are included. If your original panel includes these parts, they can be transferred from your existing control panel. No control panel overlay (CPO) is included with this panel. Please review the product image gallery to see the exact item included. Features Accurate reproduction of the original The Three Stooges arcade control panel Correct mounting layout designed for dedicated upright cabinets Durable metal construction for long-term arcade use Ideal base for installing joysticks, pushbuttons, and control panel overlay Perfect for arcade cabinet restoration or repair projects Compatibility The Three Stooges (Arcade) Dedicated upright The Three Stooges arcade cabinets Installation Notes Transfer original joysticks, buttons, wiring, and hardware from your existing control panel Install a reproduction or original control panel overlay (CPO) after mounting hardware Verify alignment before tightening mounting hardware to ensure proper fit Product Specifications Product Type: Arcade Control Panel Game Compatibility: The Three Stooges (Arcade) Cabinet Type: Upright Arcade Cabinet Material: Metal Includes: Metal control panel only Overlay Included: No Buttons Included: No Joysticks Included: No Installation: Transfer original controls and wiring Whether you are restoring a worn cabinet or replacing a damaged panel, this The Three Stooges arcade reproduction control panel helps bring your arcade machine back to its original appearance and gameplay experience.